Keeping your dog's ears clean is a crucial part of their overall health and well-being. While many pet parents might feel intimidated by the task, learning how to clean dogs' ears properly can prevent infections and ensure your furry friend stays comfortable. This comprehensive guide will walk you through the entire process, from gathering supplies to recognizing when professional help is needed.
Essential Supplies for Dog Ear Cleaning
Before you begin cleaning your dog's ears, gather these veterinary-approved supplies:
- Dog-specific ear cleaning solution
- Cotton balls or gauze pads
- Clean towel
- Treats for positive reinforcement
- A well-lit, comfortable space
Step-by-Step Ear Cleaning Process
Preparation Phase
Start by creating a calm environment for your dog. Position them comfortably - smaller dogs can sit between your legs, while larger dogs might do better seated in a corner. Have treats ready to reward cooperation throughout the process.
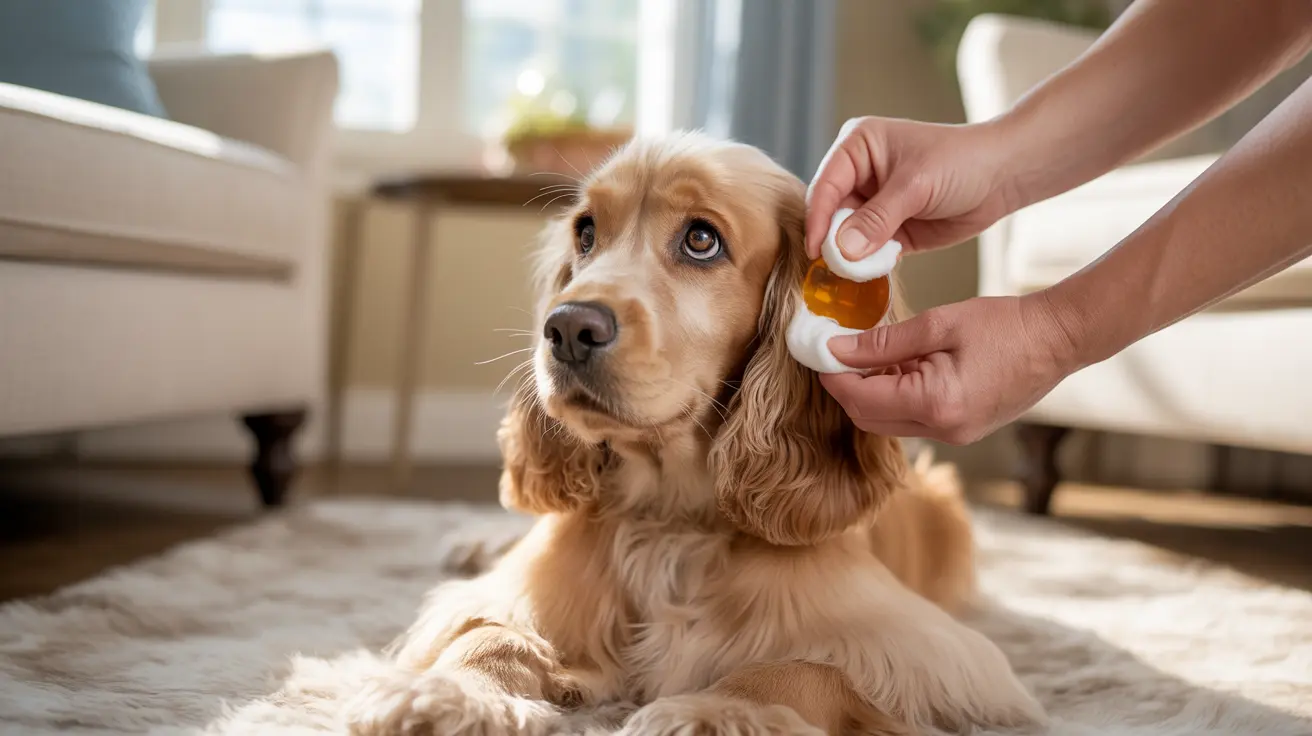
The Cleaning Method
- Gently lift your dog's ear flap to examine the ear canal
- Fill the canal with veterinary-approved cleaning solution
- Massage the base of the ear for 20-30 seconds
- Allow your dog to shake their head
- Wipe away debris with cotton balls or gauze
Safety Precautions and Common Mistakes
Understanding what not to do is just as important as knowing the proper technique. Never:
- Use Q-tips or cotton swabs inside the ear canal
- Clean with hydrogen peroxide or alcohol
- Force cleaning if your dog shows signs of pain
- Insert anything deep into the ear canal
Breed-Specific Considerations
Different dog breeds require different levels of ear care attention:
- Floppy-eared breeds (Cocker Spaniels, Basset Hounds) need more frequent cleaning
- Dogs with hairy ear canals (Poodles, Schnauzers) require special attention
- Swimming dogs benefit from more regular ear maintenance
Signs of Ear Problems
Watch for these warning signs that indicate a need for veterinary attention:
- Frequent head shaking or ear scratching
- Redness or swelling
- Unusual odor
- Dark or excessive discharge
- Pain or sensitivity during cleaning
Maintaining Regular Ear Health
Establish a routine ear-checking schedule, typically every 1-2 weeks. Regular monitoring helps catch potential issues early and maintains your dog's ear health over time.
Frequently Asked Questions
What are the best products to use when cleaning my dog's ears, and how often should I clean them?
Use veterinary-approved ear cleaning solutions specifically designed for dogs. Cleaning frequency varies by breed and individual needs - typically ranging from weekly to monthly, depending on your dog's ear type and lifestyle.
How to safely clean a dog's ears at home without causing irritation or infection?
Use gentle, approved cleaning solutions and cotton balls or gauze. Never insert anything into the ear canal, and always work slowly and carefully while monitoring your dog's comfort level.
Why is it important to avoid using cotton swabs or harsh chemicals when cleaning a dog's ears?
Cotton swabs can push debris deeper into the ear canal and potentially damage the eardrum. Harsh chemicals can irritate sensitive ear tissue and disrupt the natural ear environment.
What signs indicate that my dog has an ear infection, and when should I seek veterinary help?
Watch for redness, swelling, unusual odor, excessive scratching, head shaking, or dark discharge. Seek veterinary care immediately if you notice any of these symptoms.
How can I make ear cleaning a positive experience for my dog, especially if they are fearful or anxious about the process?
Use positive reinforcement with treats, maintain a calm demeanor, and break the process into smaller steps. Start slowly and gradually build up to full cleaning sessions while consistently rewarding good behavior.
Conclusion
Regular ear cleaning is an essential part of your dog's grooming routine. By following these guidelines and maintaining consistency, you can help prevent ear problems and ensure your dog's comfort. Remember to always monitor your pet's reaction during cleaning and consult your veterinarian if you notice any concerning signs.